 I bought a kit last year from a SU! demo to make these cute little gift boxes...I am so glad I had these on hand this week. I forgot some important people in my children's lives who I want to get a little gift to for Christmas. Phew..these were all ready to go! This was a first for me! I just have to purchase a gift card and maybe a little candy and and the gift is good to go! I do have the directions to these..so in the next year, if you are interested in making these for Christmas 2011, let me know..I can make up a kit for you....
Tuesday, December 14, 2010
Christmas characters: top note die
I bought a kit last year from a SU! demo to make these cute little gift boxes...I am so glad I had these on hand this week. I forgot some important people in my children's lives who I want to get a little gift to for Christmas. Phew..these were all ready to go! This was a first for me! I just have to purchase a gift card and maybe a little candy and and the gift is good to go! I do have the directions to these..so in the next year, if you are interested in making these for Christmas 2011, let me know..I can make up a kit for you....
Thursday, November 18, 2010
CD tin alter
 I bought a few of these tins on SU! clearance rack and altered to make Thanksgiving gifts to thanks those special people in my kids' lives like piano teachers, school teachers, Sunday School teachers, etc. I think they were only $1.99
 All I did was layer some paper, ribbon and embellish with a few stamps.....
Inside are the goodies..peppermint patties all decorated (but not by me...a customer's son. His name is Drew and he has his own busines..doesn't he do a super job!?) I apologize this photo would NOT flip. Anyway..I thought this would be a simple way to say thank to someone this season!
Tuesday, November 9, 2010
Cards using Rub Ons


Today I attempted to make the project by LeAnn Greff came up with using the Holly Jolly rub ons and designer paper...LOVE IT! It was so easy and the cards turned out really cute. I made an accordian file a couple of weeks ago using the same paper, so I think I make more of them and stuff them with these cards--great Christmas gifts! This morning I made 10 cards, but the pack of rub on could easily make 20 or more cards. Great value!
Tuesday, November 2, 2010
 If you were wondering how the candle in the Holiday Mini was altered I have the answer! It is very simple. All you need is the two sided tacky tape and glass glitter! First, you wrap your candle in the two sided tape to the desired height. Unwrap the second side and roll the candle in the glass glitter. That is it! You then can embellish your candle however you like. Makes a beautiful gift for Thanksgiving or Christmas! The candle you see above is one I am working on for Thanksgiving. Literally took me less than 10 minutes. Now I just have to figure out what stamp I want to use to embellish it. I am going make these for some Christmas gifts!
Saturday, October 30, 2010
Stamping Up! Products for Sale
The following SU! items are for sale. If you are interested in anything, email me and I can arrange a way to get it to you!
Stamps:
Time Well Spent: $8.00
Happy Heart Day:$5.00 SOLD
In the Spotlight: $5.00
One Smart Cookie: $5.00
Blooming with Happiness: $3.00
Very Punny: $3.00SOLD
Falling Leaves: $5.00
Twick or Tweet: $5.00SOLD
One of the tag sets that has 11 stamps ("yum yum" , thank you, baby, Friend, etc):$5.00
Petal Prints: $5.00
Season of Friendship: $5.00
Wonderful Words: $3.00
Something Sweet (clear stamp and unused): $8.00
Perfect Presentation: $3.00SOLD
Buttoned Together (Close to my heart set and is clear): $5.00
Brand new:
Pack of Green Galore paper: $3.00
Pack of Pink Passion paper: $3.00
Pack of Pixie Pink paper :$3.00
Pack of Brocade Blue paper :$3.00
Pack of barely Banana paper:$3.00
Pack of Bordering Blue paper:$3.00
Ink all $2.00
Craft Mellow Moss (2)
Blush Blossom
Taken with Teal
2 Apricot Appeal
Pixie Pink
Orchid Opulence
Pink Passion
Crushed Curry
Gable Green
Cameo Coral
Yoyo Yellow
Pale Plum
Dusty Durango
Bordering Blue
Misc.
stampin' color index colors (0ld colors) $1.00
Decor Elements:
2 small red "Jingle All the Way" : $3.00
1 "EAT" with a fork under it
My wonderful husband bought me more shelving today so I am reorganizing. It is just so hard to part with my stamps, but I would rather them be used than sit.
Thursday, October 28, 2010
Tuesday, October 19, 2010
Stair Step Cards


To make a stair step card I use my Score Pal, but you can use your paper trimmer with the scoring tool.
1. Start off with a 51/2 inch by 10 1/2 inch piece of cardstock
2. Score the cardstock on the 1o 1/2 inch length at the 2 1/2 inch, 4 1/4, 6 inch, score marks
3. Move your cardstock to the 3 inch Score groove and score at 4 1/4 inch mark.
4. Slide your cardstock at the 6 inch score line you already have scored and place it at the 2 inch groove on the Score Pal and score at the 4 1/4 inch line.
5. Now you fold the cardstock in mountains and valleys...like a fan and you are ready to decorate!
I will post some examples, starting with a Halloween card we made at club last year.
Tuesday, October 5, 2010
Waffle Paper Pilgrim Hat
Waffle Paper Pilgrim Hat
I found this cute Thanksgiving 3D project. Click on the link above and it will direct you to a photo. You can also download directions from this demo's website.
I found this cute Thanksgiving 3D project. Click on the link above and it will direct you to a photo. You can also download directions from this demo's website.
Sunday, October 3, 2010
Thanksgiving alter
 I found this jar of fire balls at Walmart for $3 in the Halloween candy section. They also had gummy worms and other candys too. I just thought the fireballs were the right color for Thanksgiving theme and what a great little jar to alter and give away to someone as to thank them!
 All I had to do was stamp an image and glue it to the lid! I did do a few layers but it was so simple! The ribbon was already on the jar when I bought it! It literally took my 10 minutes to whip this little gift up...how cute would this be on someone's desk? Maybe a teacher, a dad, mom? Anyone that you are thankful for..it doesn't have to be a huge gift to say thank you!
Sunday, September 26, 2010
Giveaway`
I have a great little Halloween giveaway. All Stampin' Up products...all you have to do is leave a comment on this blog..Tell me what is your favorite Halloween candy? The first one to guess the same candy as my absolute favorite, wins!
You can leave a comment once a day ( you have to have more than one favorite candy!) and the contest ends on Friday, October 1, 2011 at 5pm. I will post some pictures later of the prize!
You can leave a comment once a day ( you have to have more than one favorite candy!) and the contest ends on Friday, October 1, 2011 at 5pm. I will post some pictures later of the prize!
Saturday, September 25, 2010
Fall Fun!
 We are going to be making these cute little guys using this petal punch from Stampin' Up at my September club. I got the idea from another blog, creationsbypatti.blogspot.com. This punch is great..it punches and scores at the same time!
 So we have a mummy, ghost and pumpkin treat holder...it will hold a hershey's kiss, rollo, something along their sizes.
 Sorry this side view is a bit blurry...I glued to petals together to form a box. My kids are excited to make these for their teachers...a little surprise on their desk!
Thursday, September 23, 2010
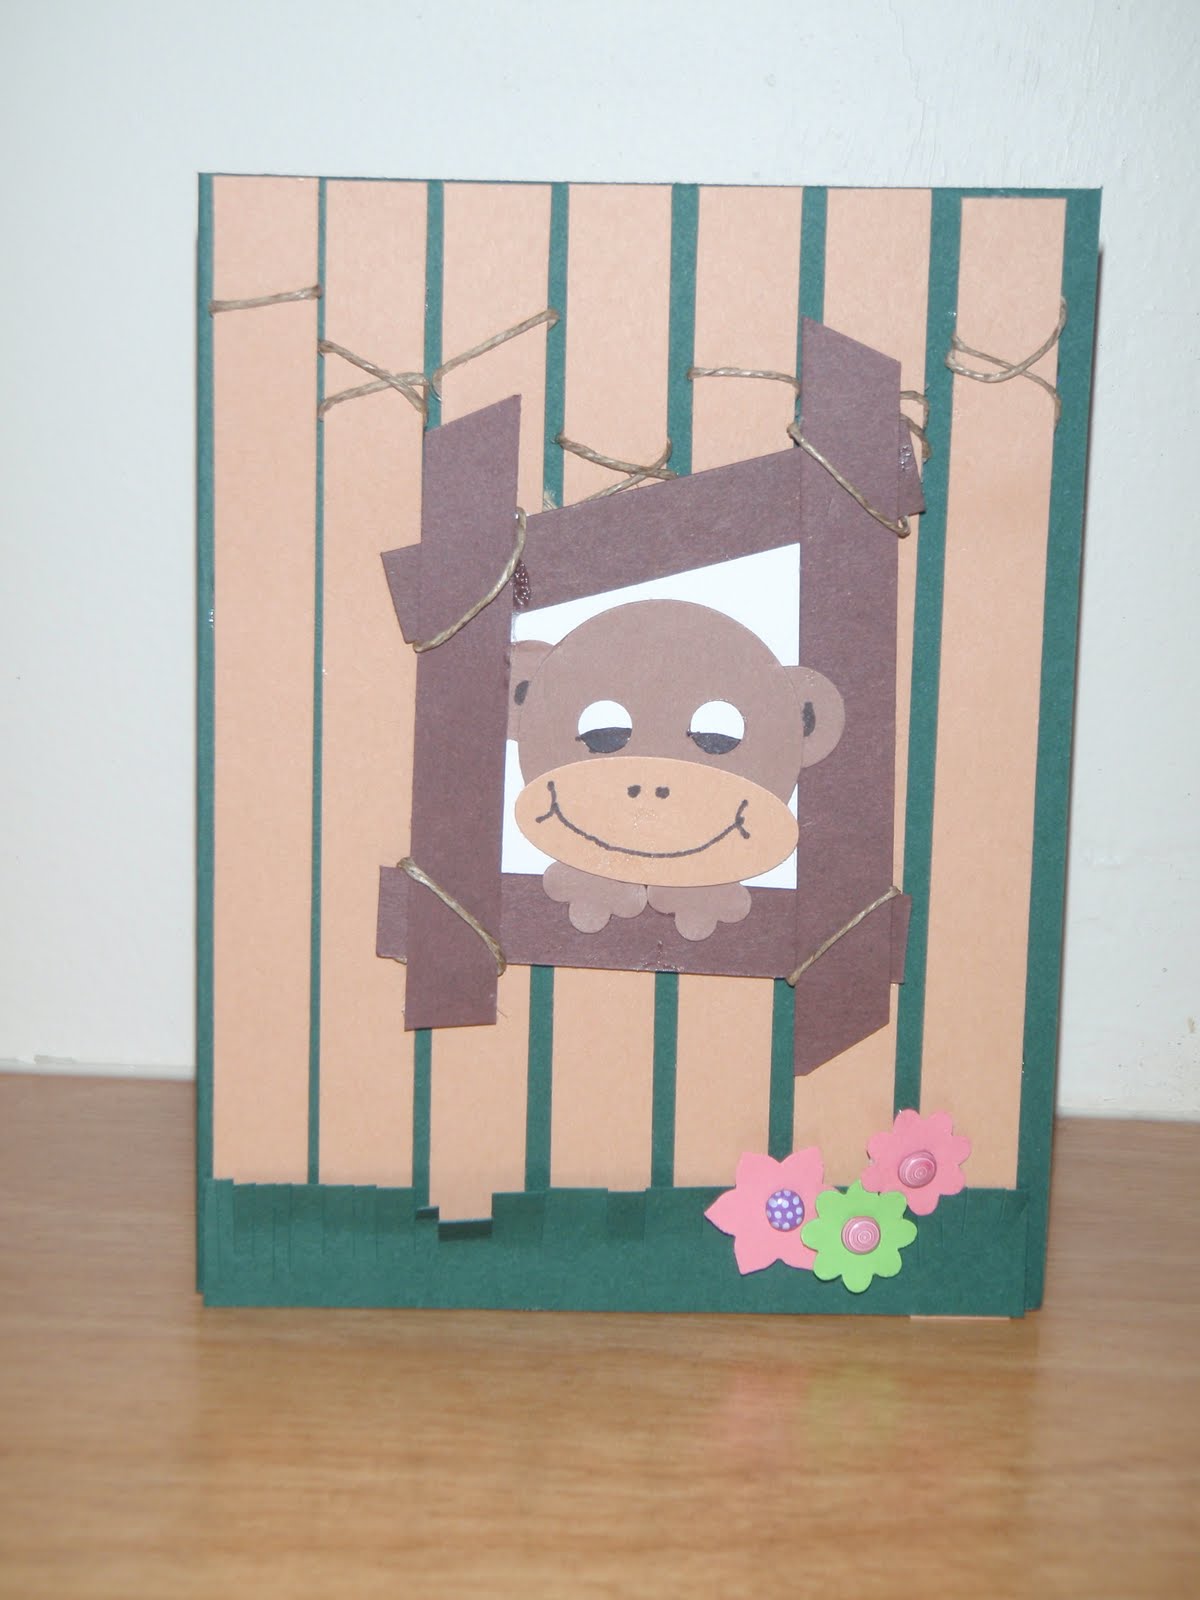 I saw this monkey in one of my demo magazines. I thought he was so cute with his head peaking out the window!
Saturday, September 18, 2010
Recycling old memo board

 It has been way too long since I have posted! Sorry, but life has been a bit busy these days with school kicking into gear. This post isn't technically stamping, but still on the recycling theme. I had this wipe on/wipe off memo board that was worn out. So to get some mileage out of it, I cut out some designer paper and glued it onto the memo board..it now is just magnetic and I will use it for messages/notes.
Thursday, September 2, 2010
Recycle/Halloween
 What to do with these toilet paper tubes?? I will give a quick overview of a what I did!
 First you cover it with your favor designer paper..here I used Stampin' Up Nite Owl paper
 Then I took the waffle paper and glued it to the inside of the tube (top and bottom) and ruffled as I went along. I then flaired it out.
 I glued a 6 inch piece of ribbon to one side of the tube then threaded it through a scallop circle punched out of the designer paper and glued to the other side of the tube. I then took a strip of black paper and glued it to the inside of the tube to hide all the mess! Notice the waffle paper got smooshed..I had to crinkle it again..this is super neat paper!
I embelleshe my tube and here it is! The top slides up and down. I will fill it with candy!
Tuesday, August 31, 2010
Altered Notepad
 I found these matchbook notepads at Big Lots in the wedding section and when I saw them a light bulb went off! Easy project to alter! I cut some designer paper to fit the notepad and adhered it. I stamped a saying and punched it out with my circle punch. I punched out a bigger circle and glued the two together. I used a dimensional to "pop up" the circle...it is used to tuck and close the notebook. I finished it off with some ribbon.
Thursday, August 26, 2010
Punch Art

Kissing Fish...how about this card to send to someone you love for just for fun or Valentine's Day. The fish's body is a circle and fins are an oval punch. The red scales are from the circle scallop punch, but I punched it in half with a regular circle punch (the one I used for the body) to get it to fit on the body. The lips are from a flower punch..I just used 2 of the petals to make the lips. The bottom of the sea (the white) is cardstock punched out with the scallop border punch. To finish it off with a punch, I used 2 different sized heart punches and stamped a love saying. Voila!
Punch Art


Punch Art Teddy Bear
Today I thought I would show you a card that you can make it just a few seconds...sometimes you need a quick card!
I made this teddy bear out of different size circles and put them together. Very simple! A cute little card for a child's birthday? I might even cut out a party hat and put it on his head....
Punch Art

Punched Polar Bear and cub.
I took a blue card stamped white snowflakes as the background. I took white cardstock and ripped into hills for the ground. The polar bears are made of circles. Their noses are ovals cut in half with a black circle at the end of it. I used glue and glitter to make the card sparkly...looks gloppy in this photo, but it isn't in person. I wish my camera would have taken a better picture..
Punch Art

Frog Bookmark Clip
I made this little guy out of circle, oval, and small flower punches. Now that I made him, I think the googlie eyes should be bigger, but all I had on hand were the small ones.
I bought the giant paper clips at WalMart. I glued the paperclip between to circles.
I am going to give this to my daughter who is an avid reader!
Tuesday, August 24, 2010
Punch Art

Pilgrim Man
I made these bags for my kids' teachers last year for Thanksgiving...a little "thank you" for all they do. We filled it with homemade pumpkin bread and pumpkin butter..REALLY yummy!
So, how did I make the Pilgrim? The man's head and hair is made from the Top Note die from SU! His eyes are made from various circle punches. I cut one in half to make the eyelids. His nose is made from the Round Tab Extra large punch. I use the 3/4 inch circle punch to cut out his nostrils. Everything else except the button on his hat is hand cut. I used the 1 3/8inch square punch with the slit punch to enable the ribbon to go through it.
That all there is too it...I also made a girl version too..if you are interested in her..email me!
Monday, August 23, 2010
Punch Art


Scallop Punch: Baby Carriage Tag
STEP 1: I punched 1 scallop out of pink paper and then cut it in half.
STEP 2: Cut a strip of white paper with scallop border punch. Cut it to fit the half of circles.
STEP 3: I then attached the scallop circles to one another to form a baby carriage
STEP 4: I made the wheels out of 3/4 inch circle punch and put brads in the middle to make the wheels of the carriage.
STEP 5: Attach wheels and punch out a small heart and attach to carriage.
STEP : Use the baby carriage for tag, card, etc. I am going to use this tag to attach to a gift bag for a girl baby gift.
Punch Art


Scallop Punch 3D Flower!
STEP 1: Punch out 4 scallops of your favorite designer/scrapbooking paper. Punch out 2 ovals for the leaves.
STEP 2: Take 2 of the circles and cut a slit to the middle in each of them. Take the 3rd circle and cut out 1 scallop like a piece of pie. For the 4th circle cut out 2 of the scallops like a piece of pie.
STEP 3: Glue the ends of the circle together..You will form a cup with each of the scallops.
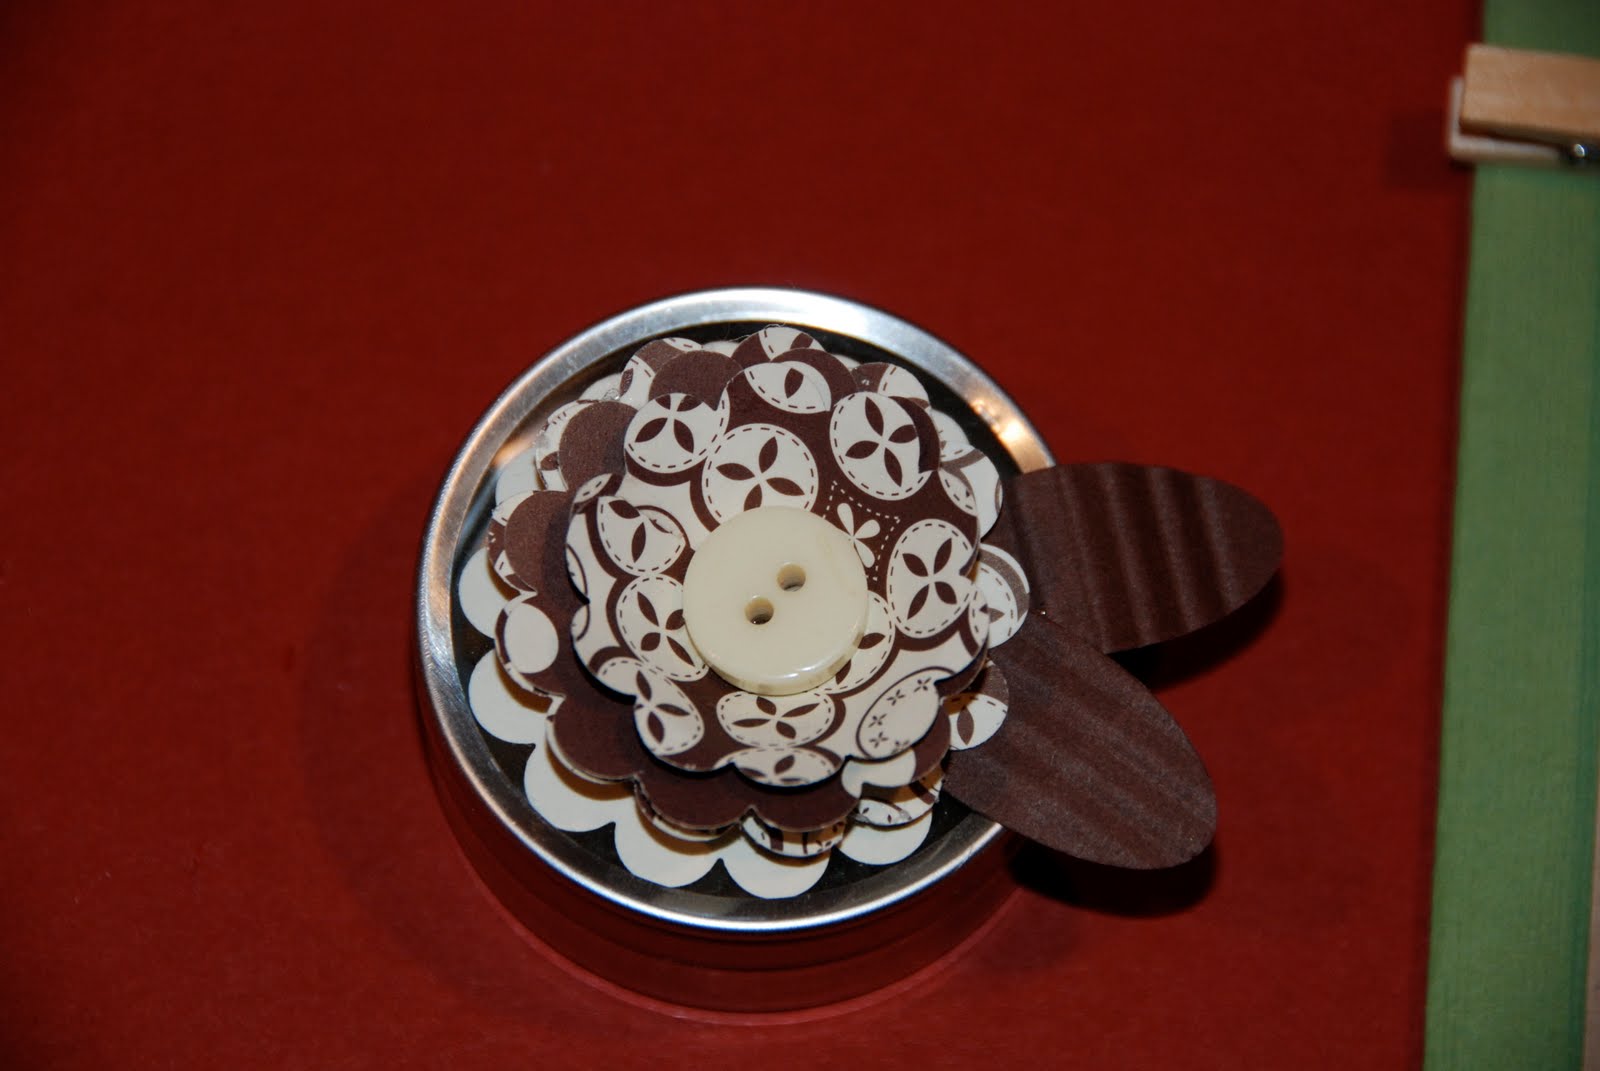
STEP 4. Stack the circles on top of one another to build the flower gluing each layer. You will need to smash the point a bit to enable the circles to sit on top on each other. Attach the leaves. Use a button or jewel for the center of the flower and VOILA!
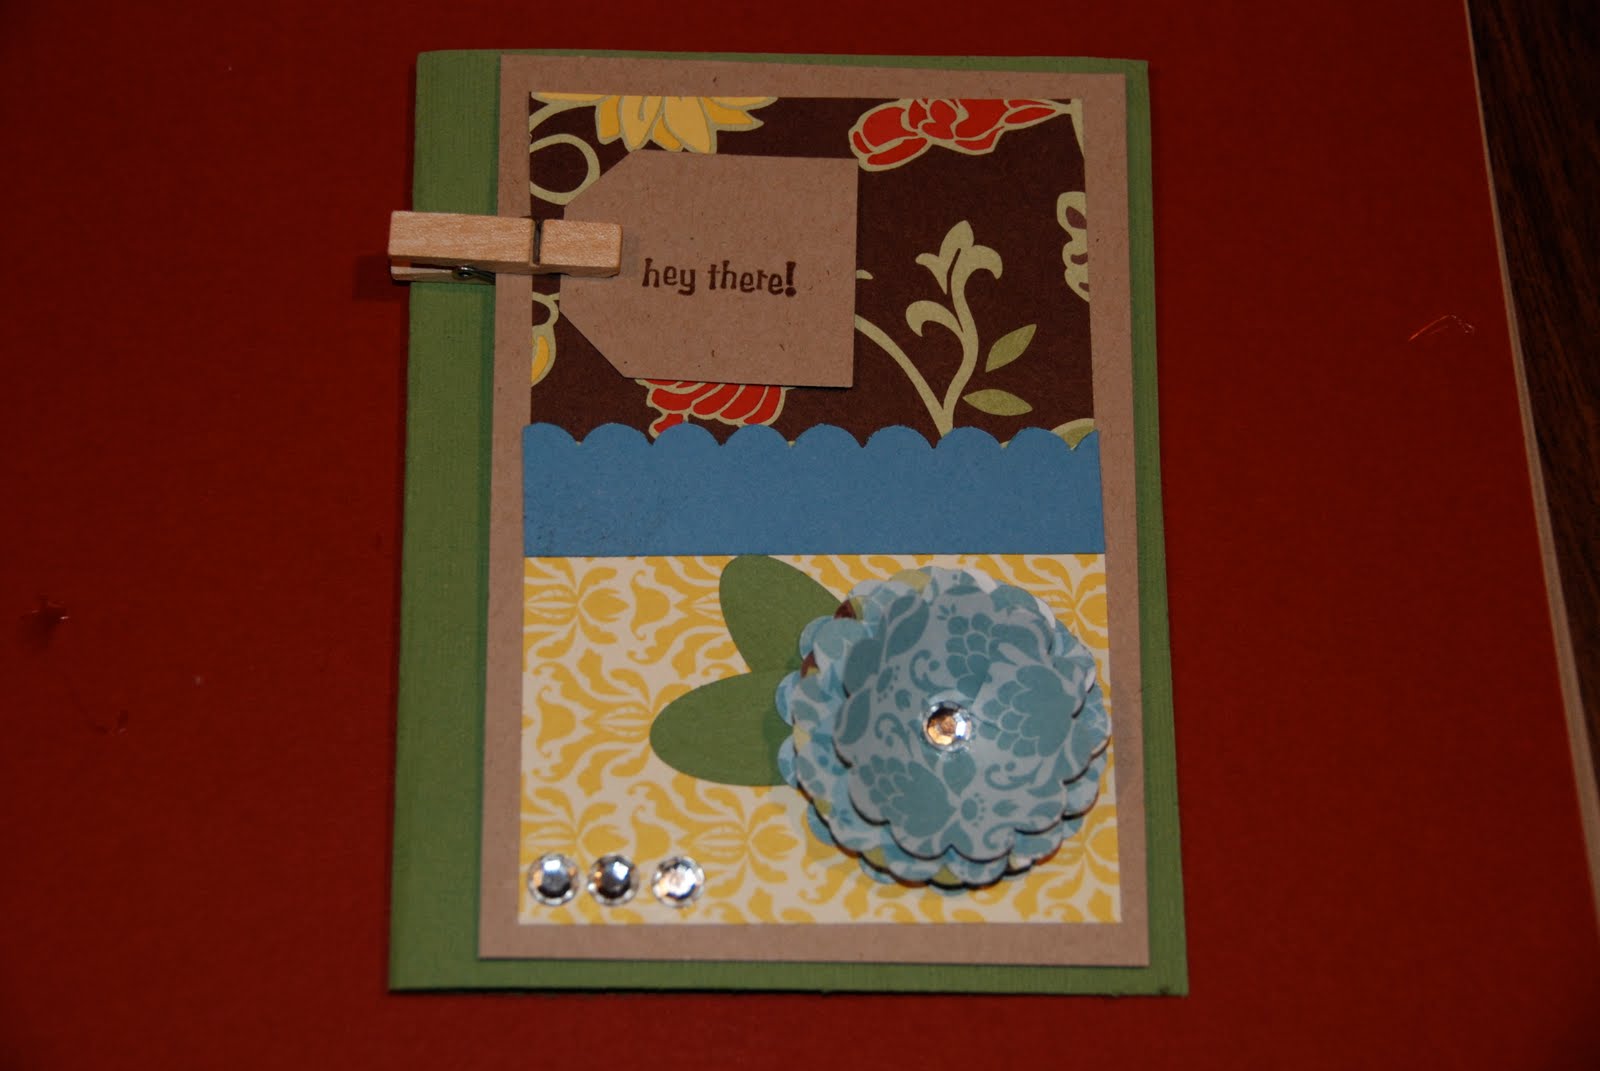
I have 2 examples of how I used the flowers (pictures on the top and bottom). Use these flowers for cards, etc. I also found this little favor can at the Dollar Store and embellished it with a flower.
Sunday, August 22, 2010
I love punches...ask my family, I have lots of them! They are so versatile...so to give you some ideas, I am going to spend the next 7 days posting ideas using punches. A great way to embellish cards, scrapbook pages, gift bags, etc! So check in each day for some cute ideas!! Your punches won't be collecting dust anymore.
Thursday, August 19, 2010
Crafting for a Cause
I stumbled across this on JoAnn Fabrics Blog today...Crafting for A Cause contest. What a great idea! Here is the link. Perhaps you can use your craft to raise some money for your favorite charity! Check out the link below. I am going to do some brainstorming.....
/joannfabricandcraftstores.blogspot.com/2010/08/twice-as-nice-to-craft-for-cause.html
/joannfabricandcraftstores.blogspot.com/2010/08/twice-as-nice-to-craft-for-cause.html
Saturday, August 7, 2010
Desktop Calendar


 My stamping club made this desk calendars. I printed the calendars from a website (www.printfree.com) off the internet. The base of the calendar is an 8 x 11 piece of cardstock folded in half. I then embellished each side (front and back) according to the months assigned to that side. When I was done, I punched 2 holes at the bottom and strung ribbon through it and tied a bow. That kept the calendar standing and from falling down. For more specific instructions, you can always email me!
Wednesday, July 28, 2010
Kids' Cards


These Sesame Street character cards are very simple to make, as you only need a few tools.
I used 2 different sizes of circle punches for the eyes for Cookie Monster, Elmo, and Oscar the Grouch. For the others I used an oval punch for the white but a circle for the pupils (black). The Noses are also the oval punch. Hair and mouths are all drawn free hand and cut. Oscar's tongue is a heart punch. See, simple! If you need more exact directions email me...I also can always put these together as a kit for you too. Make a card for your favorite little person and make his or her day!
Tuesday, July 27, 2010
Storage Ideas

I found these plastic jars in Target's dollar spot....what a great idea to store buttons, scraps of ribbon, etc. I grabbed myself a couple of these for my shelves in my crafting area.
Monday, July 26, 2010
Mummy Can

I know it seems early, but I always like to get a jump on my project for the holidays, whether it be for the fall or Christmas. Once the school schedule starts, I know my schedule gets busy and my stack of "to do" projects gets harder to tackle. This Mummy Can is so cute and very easy to make. I bought the smaller, empty paint can at Home Depot for a few dollars. All I did was wrapped gauze around the can and secured it with glue. I punched out circles for his eyes. I tucked the eyes into the gauze but used glue to adhere them to the gauze to make them secure. To finish him off I sponged some brown ink on the gauze to make him look aged. I like to fill these cans with candy, cookies, or some sort of goodies for neighbors, friends, teachers, etc at Halloween...a simple, cute gift, that even the kids can help make!
Friday, July 23, 2010


Subscribe to:
Posts (Atom)